

Overview
Default Settings let you pre-select the options that get applied whenever anyone on your team creates a new position. This makes it easier to get to the right configuration quickly, without everyone having to remember or re-set the same options each time.These are only defaults. Team members can still change any of these settings on individual positions, in Tailoring the Interview.
Where to find these settings
1
Open your account
Click on your account name.
2
Find the Default Settings section
Look for the Default Settings section in the menu.
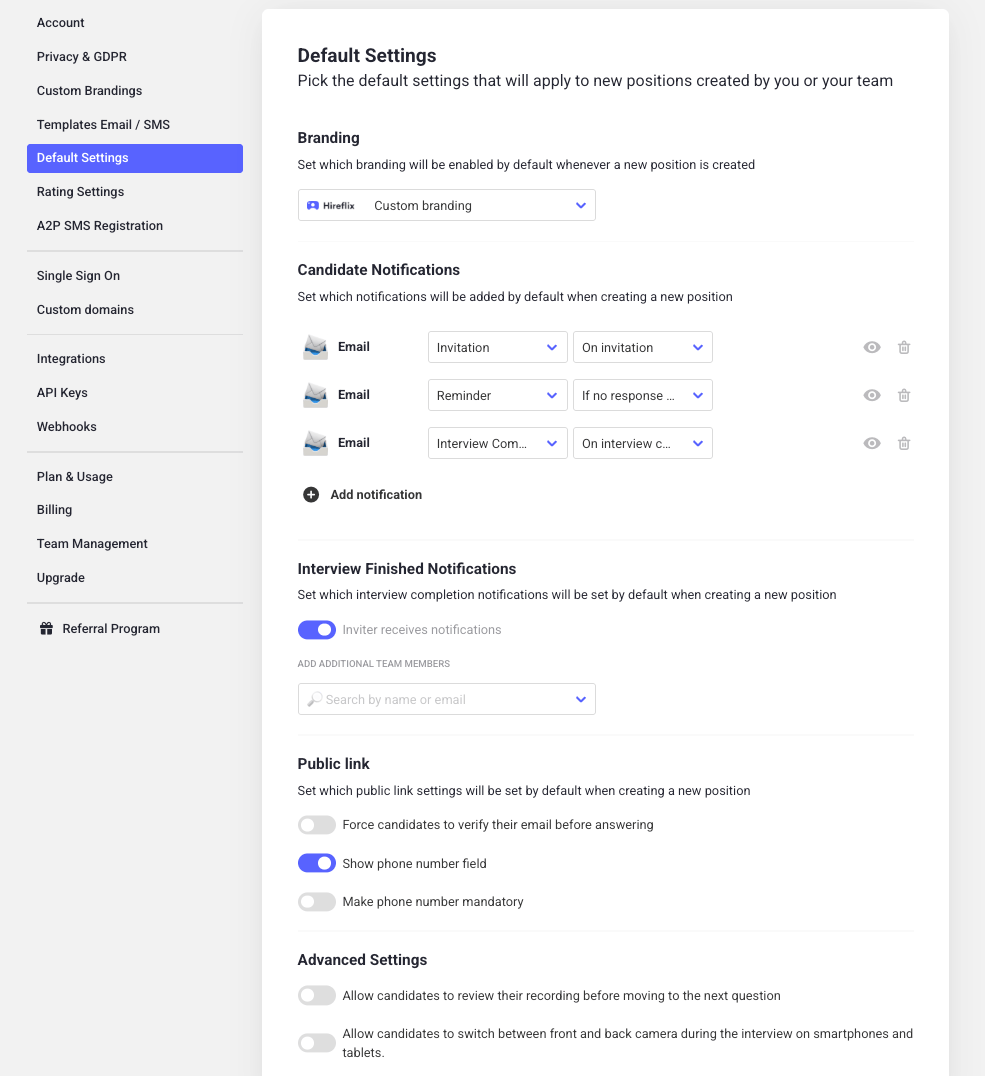
Configuration options
Default branding
Choose which custom branding new positions should use by default, so every interview matches your company’s look and feel from the moment it’s created.Candidate notifications
Choose which messages candidates receive by default, such as invites, reminders, and completion messages. This saves your team from having to enable these on every new position.Internal notifications
Choose which internal notifications your team receives by default, and who should receive them. This maps to the same Inviter receives notifications toggle and additional team members list covered in Notifications & Reply Routing, just applied as the starting point for new positions.Public link
Decide whether new positions should have a public link enabled by default, so candidates can start applying without waiting for an individual invitation. A public link is a single shareable URL that any candidate can use to start the interview, unlike individual invitations that create a unique link per candidate. It’s useful for embedding on your careers page, sharing on social media, or handing off from your own application form. You can also prefill candidate details (name, email, phone) through URL parameters, so candidates don’t have to re-enter information you already have.Email verification
Require candidates to verify their email address before they’re able to start answering questions. This helps confirm you’re reviewing responses from the candidate you actually invited.Advanced settings
Review recording before continuing
Allow candidates to review their recorded answer before moving on to the next question, instead of submitting it automatically.Front and back camera switching
Allow candidates on smartphones and tablets to switch between their front and back camera during the interview.Learn next?
Learn how to override these defaults on an individual position.