

Overview
How to set up SSO between Hireflix and Azure AD.Steps
1
Create the enterprise application
Go to Azure AD > Enterprise Applications > Create an app and name it Hireflix (or as you wish).
2
Open Single Sign On
On the left-hand menu, click Single Sign On. This opens the app’s SSO setup.
3
Get the Hireflix metadata file
Go to Hireflix > My Account > Single Sign On and open the Service Provider Metadata Endpoint in a new tab. Save its contents as an XML file.
4
Upload the metadata file to Azure
Go back to Azure and click Upload metadata file, then upload the file you saved in the previous step.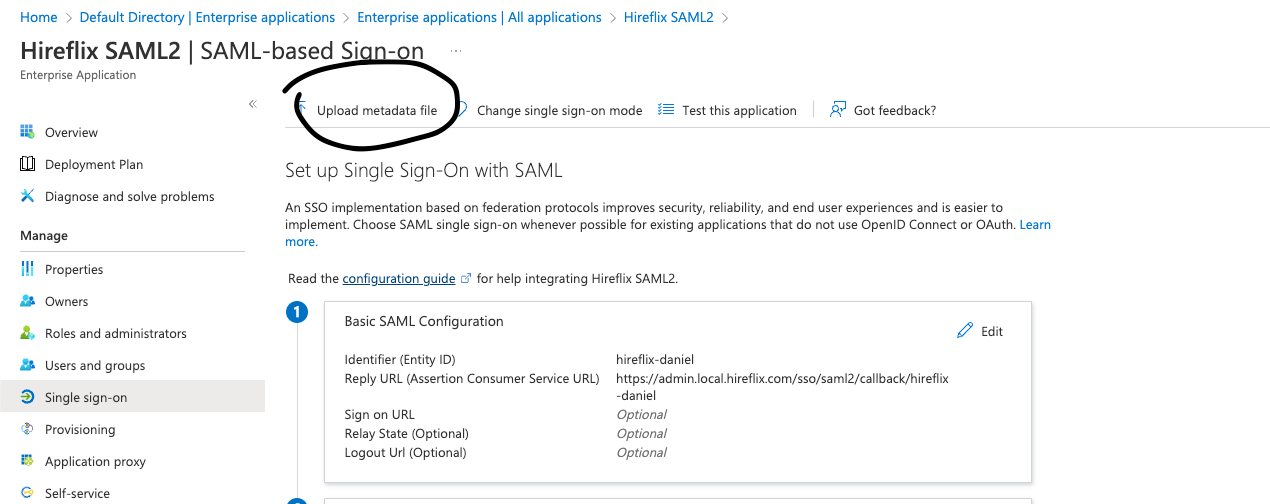
5
Configure the email claim
Go to the Attributes & Claims section and click Edit. In the required claims section, edit the first claim so its source attribute is 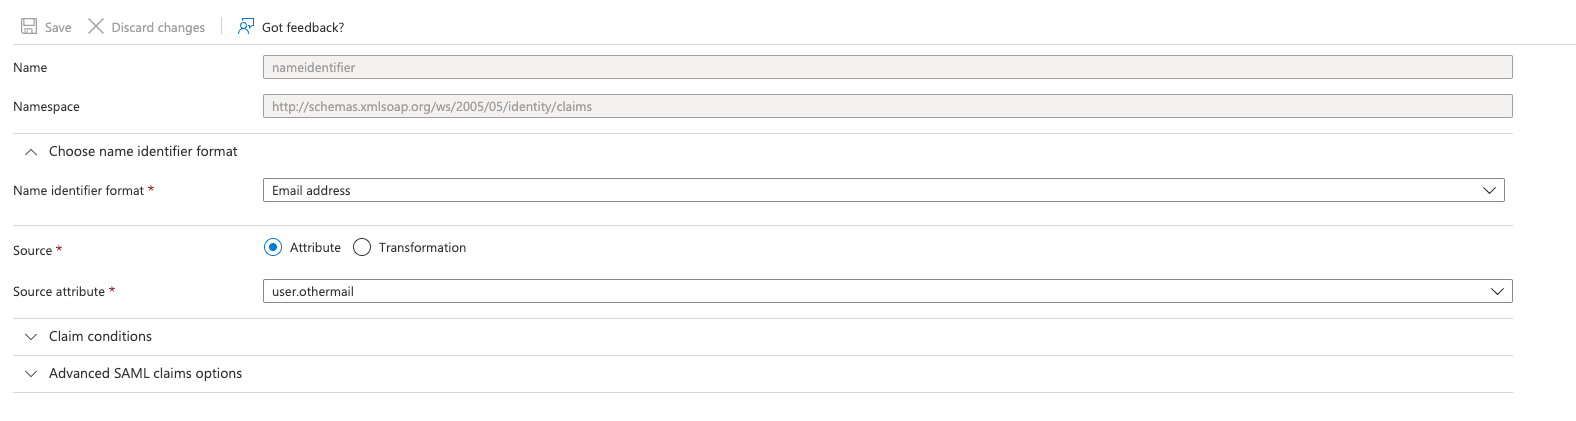
user.mail, user.otheremail, or any attribute that matches the email address of your Hireflix account.This is needed so Azure AD sends the raw email to Hireflix in the SAML2 metadata exchange.
6
Download the Federation Metadata XML
Go back to the SSO configuration screen and download the Federation Metadata XML.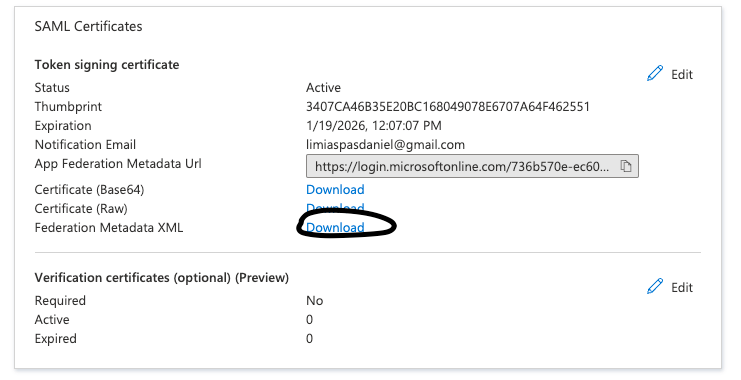
7
Upload the metadata to Hireflix
Go to Hireflix > My Account > Single Sign On and upload the file you generated in the previous step.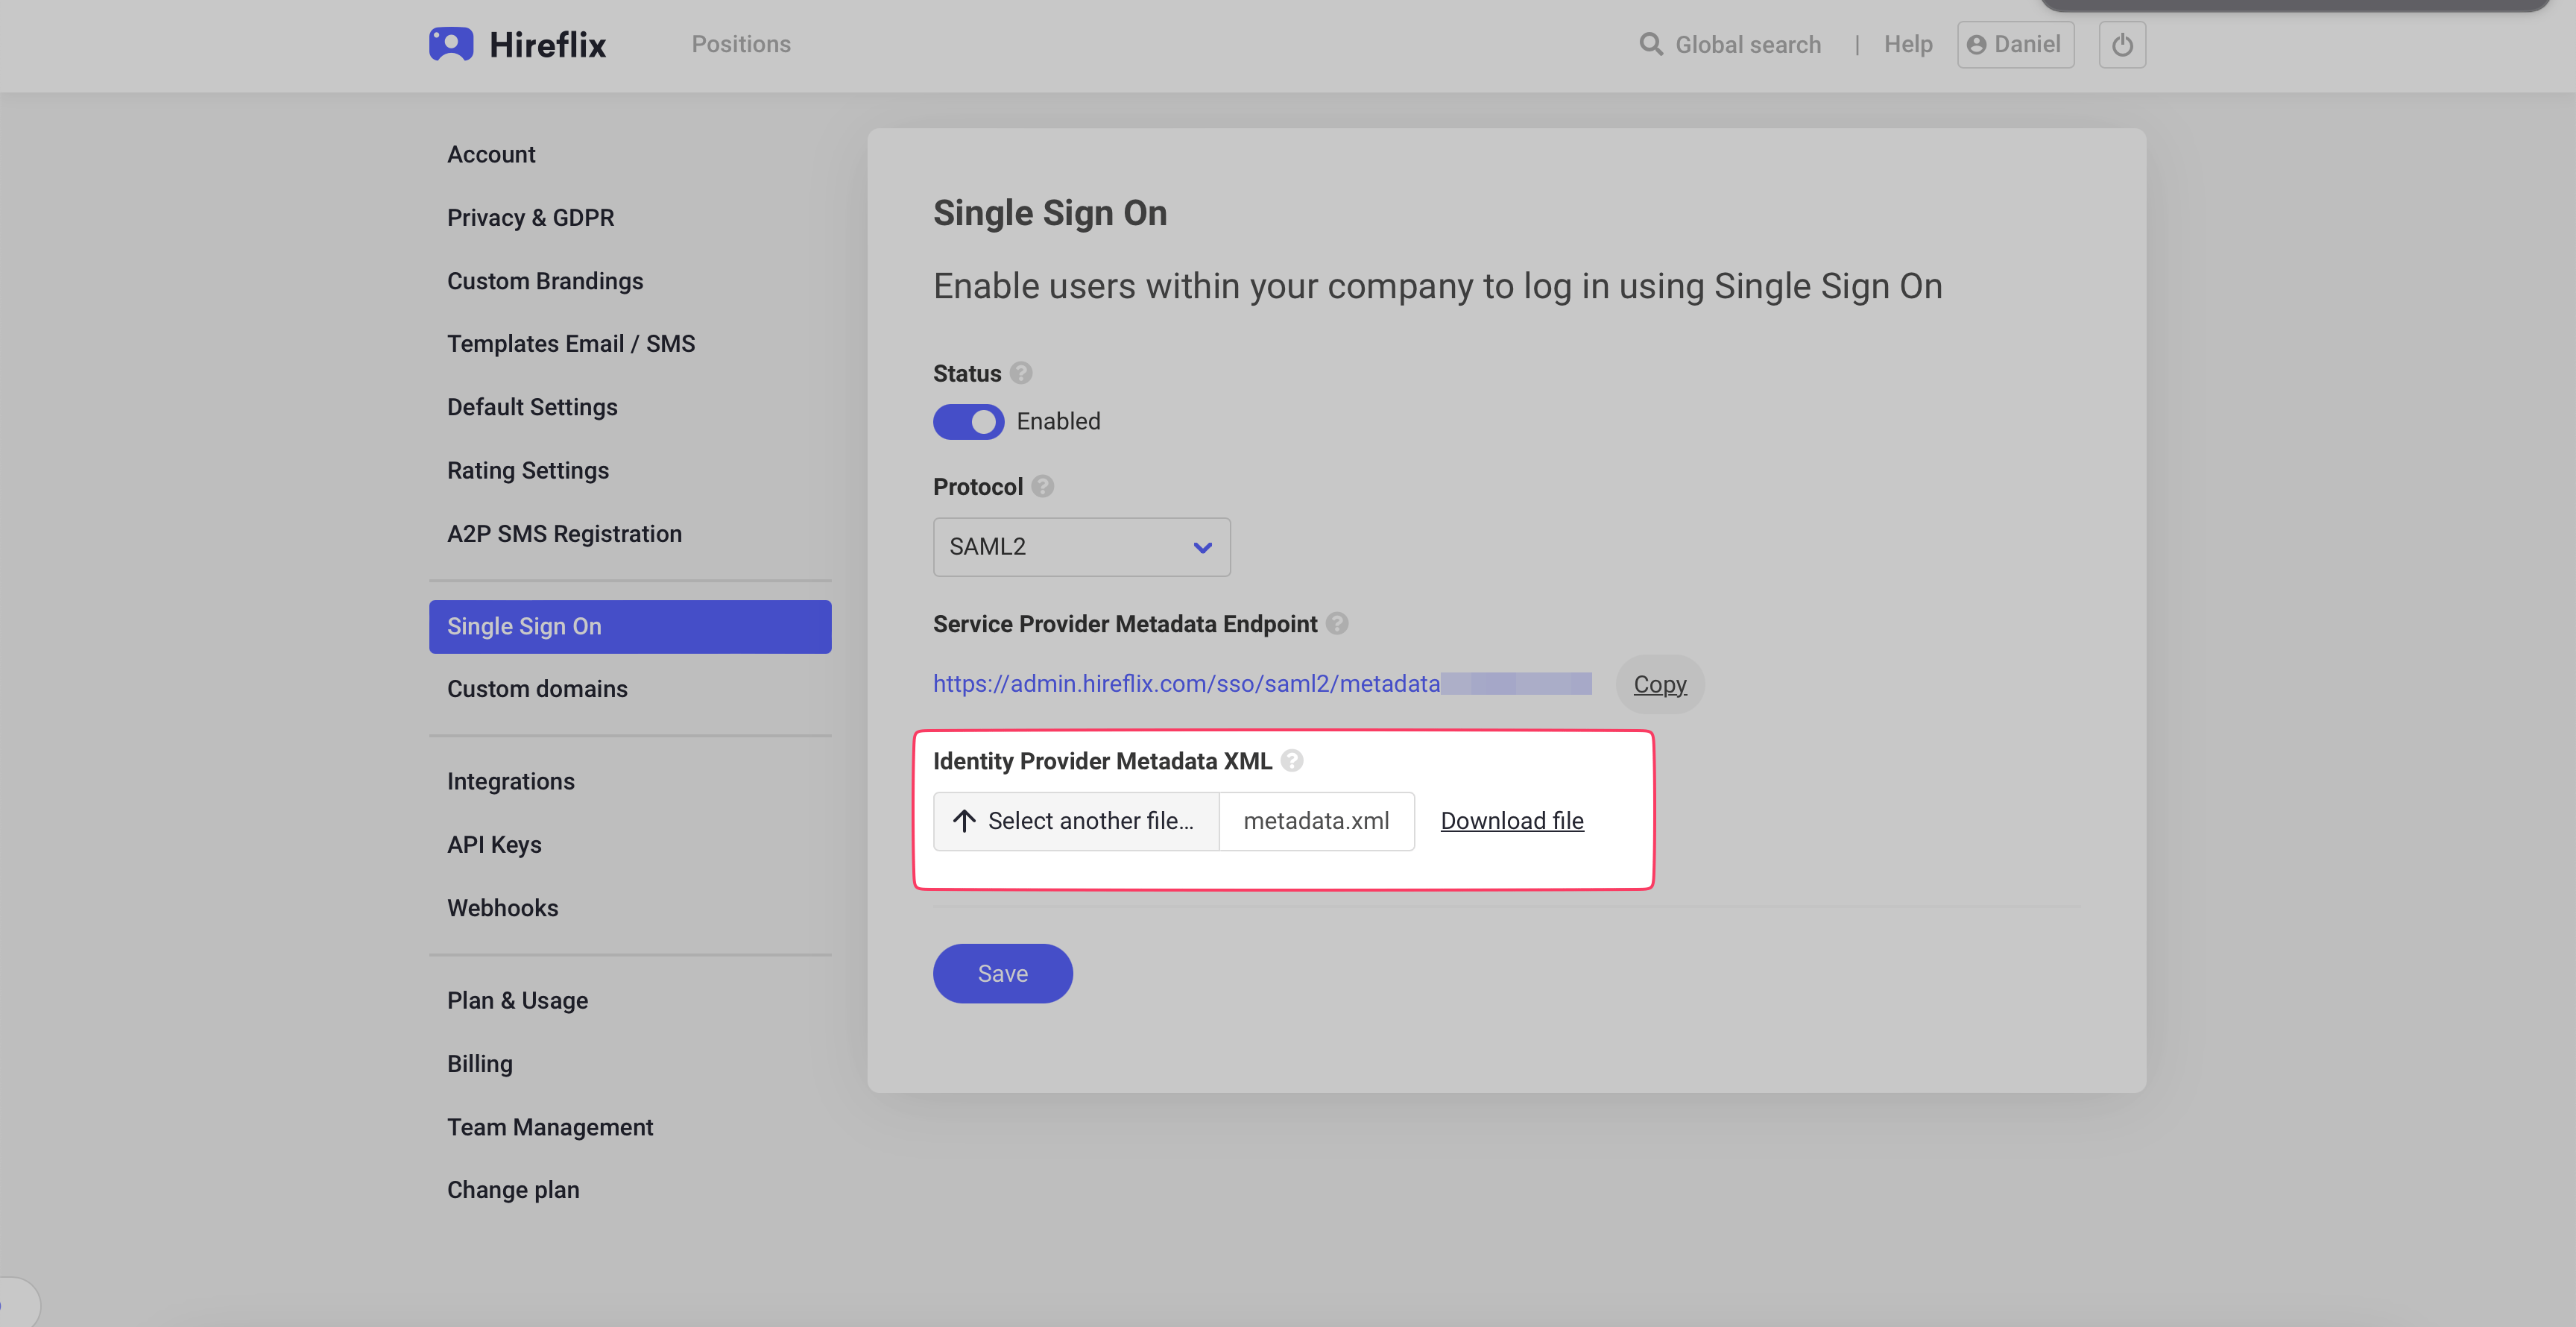
8
Save
Click Save — SSO should now be configured and working properly. Make sure your users have access to the Azure AD Enterprise App.